Manual inputs
Most of what a policy check needs, ArchNGN reads for you. Manual inputs covers the two things it can’t read from your systems. You enter each one once, for the whole account, and every workspace uses it.
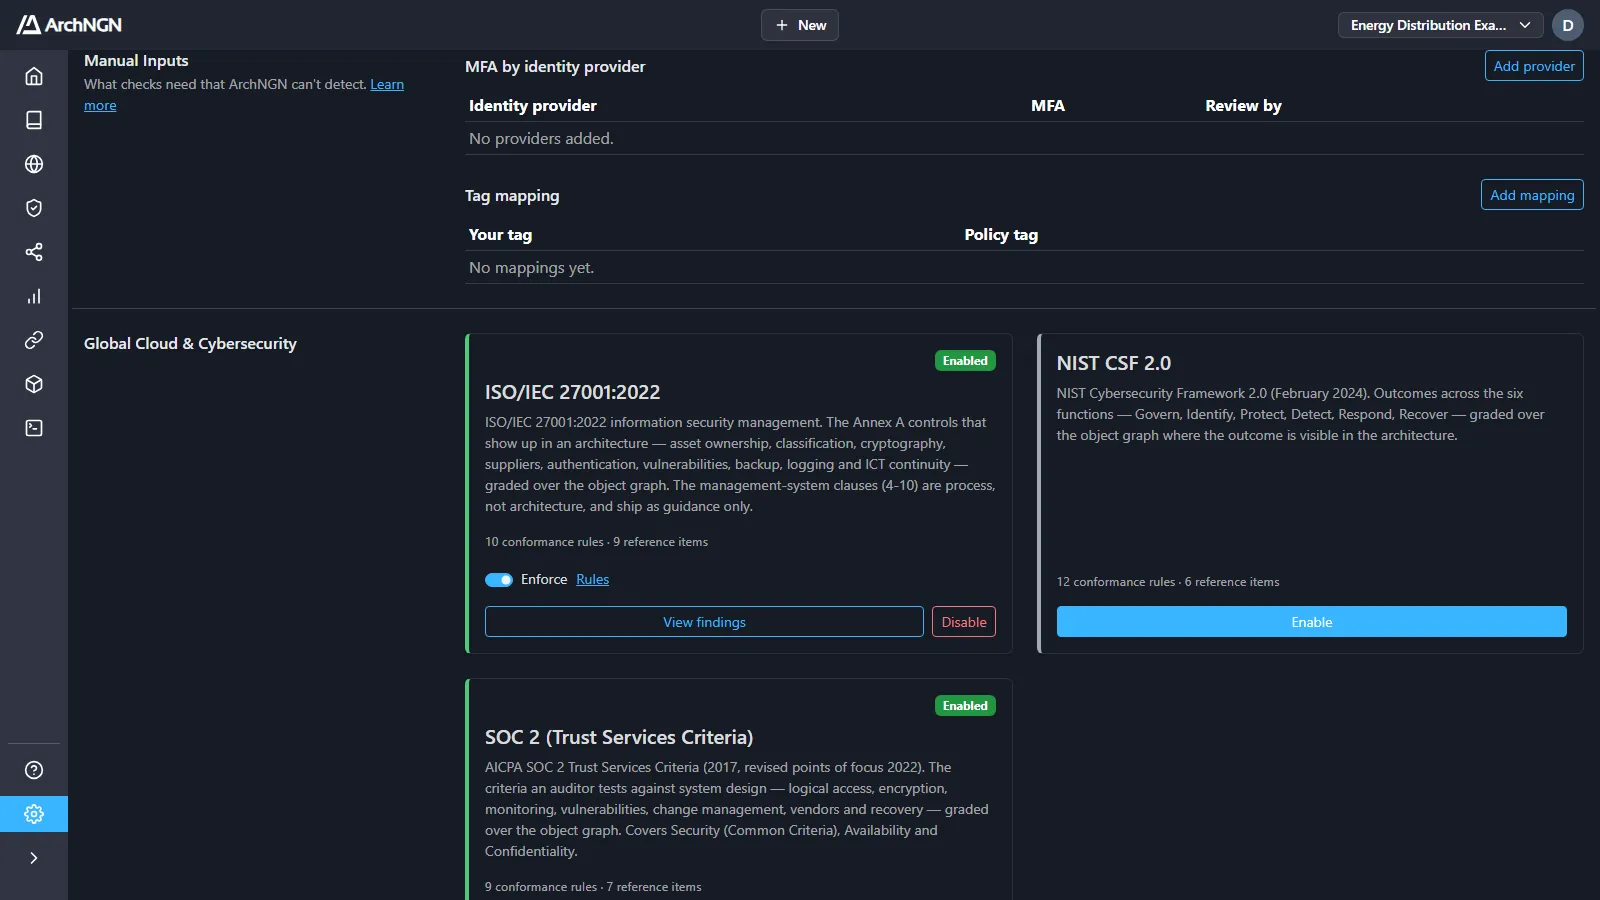
Find it under Settings → Policies, in the Manual Inputs section. Changing it needs the policy:manage permission. Account admins have it by default.
What ArchNGN reads for you
Section titled “What ArchNGN reads for you”Connect your repositories or your cloud accounts, and ArchNGN reads these from configuration:
- whether a component is reachable from the internet;
- encryption at rest and in transit;
- network placement (VPC, subnet, VNet);
- backups and region;
- single sign-on, from the identity libraries your code uses.
You don’t tag components for any of these. A component behind a load balancer or ingress inherits exposure and encryption from it.
Needs evidence
Section titled “Needs evidence”A check can come back three ways:
| Result | Meaning |
|---|---|
| Pass | The requirement is met. |
| Fail | Something shows the requirement is not met. |
| Needs evidence | Nothing ArchNGN reads says either way yet. |
A check that needs evidence is not a failure. It doesn’t block anything or count against conformance. It doesn’t count as passed either. You’ll find it under Governance → Findings, with Status set to Needs evidence, along with what would supply it. Manual inputs are one way to supply it.
MFA by identity provider
Section titled “MFA by identity provider”MFA is enforced at the identity provider, such as Entra ID Conditional Access or an Okta sign-on policy, not in each application. Auditors test it there too, so you set it once per provider rather than once per component.
The table is empty until you add a provider. Add provider lists the providers ArchNGN found in your estate first, with how many components sign in through each. Any other provider applies to every provider that has no status of its own, including sign-in ArchNGN can’t attribute to a named provider.
Add a provider
Section titled “Add a provider”-
Click Add provider and choose the identity provider.
-
Fill in the fields:
Field What to enter MFA Enforced for every user or Not enforced for every user. Based on The policy and who it covers, e.g. Conditional Access policy “Require MFA”, all users. Review by When the statement should be checked again. At most a year away. -
Click Save.
Every component that signs in through that provider then meets MFA rules. If you choose Not enforced, those checks fail rather than waiting for evidence.
After the Review by date the status shows Expired, and MFA checks go back to needs evidence. To renew it, open the row’s actions menu (⋯) and choose Update status. Remove provider deletes the row.
Tag mapping
Section titled “Tag mapping”If you already tag cloud resources or infrastructure-as-code, map your tag to the policy tag it means. One mapping covers every component, and nothing has to be re-tagged.
Add a mapping
Section titled “Add a mapping”-
Click Add mapping and fill in the fields:
Field What to enter Your tag The tag key you use, e.g. DataClassification.Value Optional. Leave it empty to match any value. Policy tag The tag policies check, e.g. classification:{value}. Suggestions appear as you type. -
Click Add Mapping in the dialog.
{value} carries your tag’s value across, in lower case with spaces turned into hyphens. With the mapping DataClassification → classification:{value}, a resource tagged DataClassification=Confidential is read as classification:confidential.
Examples:
| Your tag | Value | Policy tag |
|---|---|---|
DataClassification | (any) | classification:{value} |
PCIScope | true | pci:cde |
ContainsPII | yes | personal-data |
Backup | (any) | backup:{value} |
The policy tags are listed in Custom policies → Shared tags. To remove a mapping, open the row’s actions menu (⋯) and choose Remove mapping.
What manual inputs don’t cover
Section titled “What manual inputs don’t cover”Some requirements are records only you hold, such as a signed data processing agreement (dpa:signed) or a completed DPIA (dpia:complete). Record those as tags on the component, or accept the risk with a reason and an expiry.