Getting started
This guide takes you from signing in to a workspace that is mapped, checked against your policies and ready for pipelines and coding agents.
1. Sign in
Section titled “1. Sign in”ArchNGN is in early access. Your organisation’s account is set up with you, and you sign in at app.archngn.com with Google, Microsoft, or email and password.
→ More: Sign-in and access
2. Find your way around
Section titled “2. Find your way around”The left sidebar has one item per area. Home sits at the top. Each other item opens its first tab, and a tab bar switches between its views.
| Sidebar item | Tabs |
|---|---|
| Home | The workspace at a glance |
| Repository | Objects, Associations, Reference Library, Glossary |
| Explorer | Global, Object, Context |
| Governance | Findings, Exceptions, Checks |
| Workstreams | New Technology Design, Technology Design Review |
| Reports | Application Register, Lifecycle Radar, Interface Flows, Hierarchy Map |
| Integrations | Connectors, API Tokens |
| Model | Metamodel, Overlays |
| Jobs | Workspace, Account |
| Settings (sidebar footer) | General, Workspaces, Users, Policies, Usage, Data, Audit Log, Security |
Items and tabs you don’t have permission for are hidden. Viewers, for example, don’t see Integrations or most of Settings.
The top bar holds:
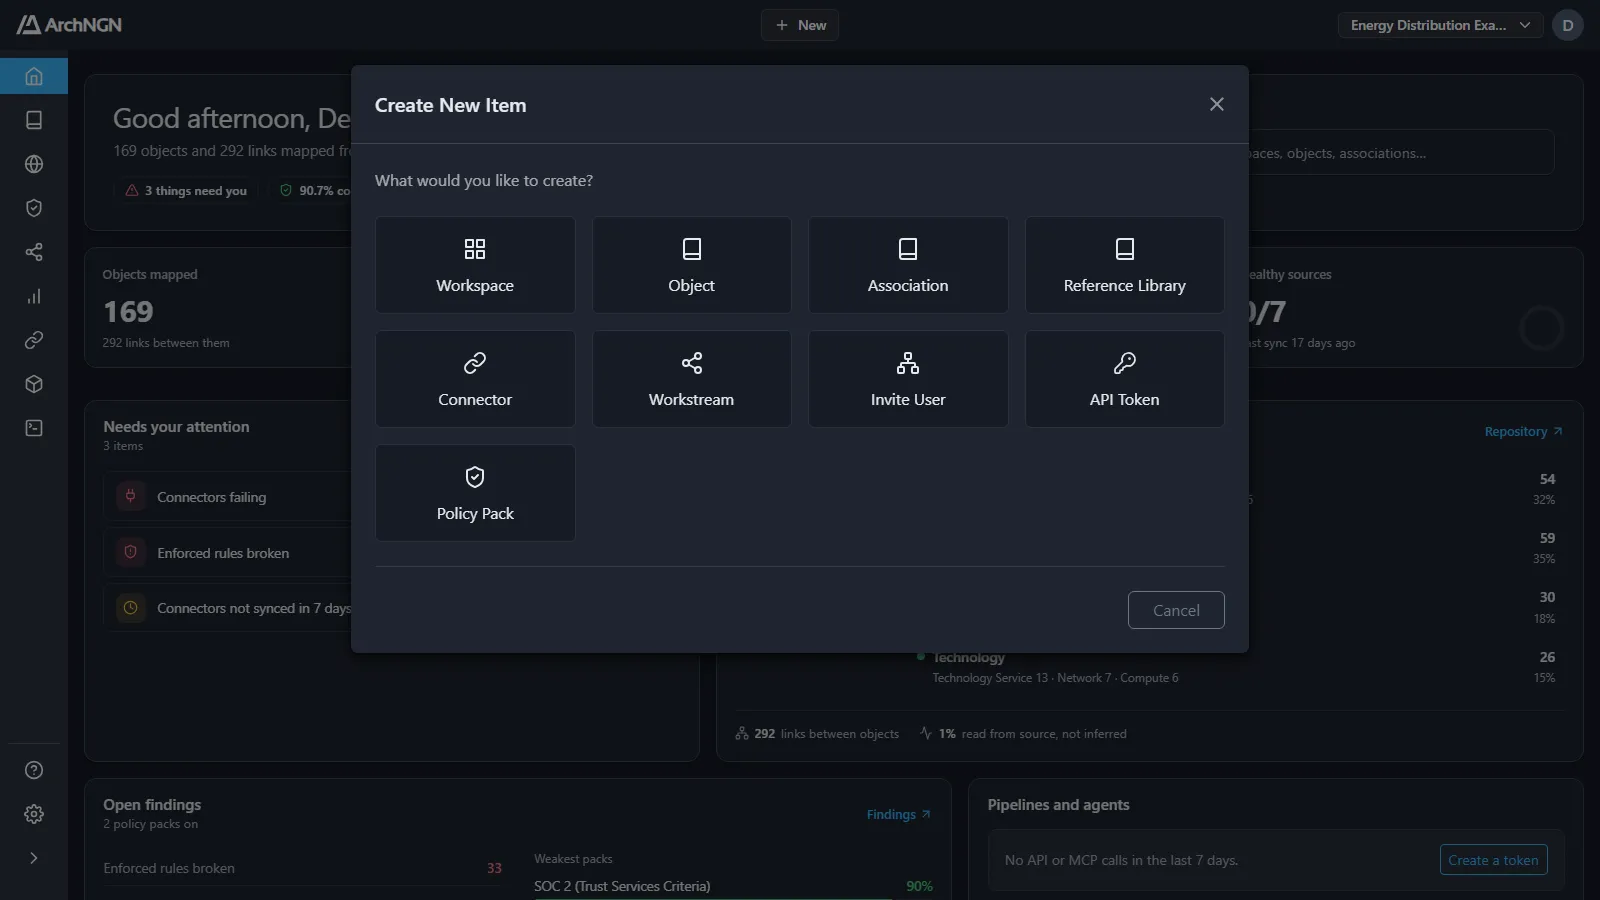
- + New: create a workspace, object, association, Reference Library item, connector, workstream, API token or policy pack, or invite a user, from anywhere.
- The workspace selector: switch the active workspace. Everything above Settings in the sidebar follows it.
- Your avatar: profile preferences (including the light or dark theme), your credit usage this month, change password and sign out. See Profile and preferences.
Press Ctrl+K (⌘K on a Mac) anywhere to search workspaces, objects and associations. The same search sits at the top of Home.
3. Create a workspace
Section titled “3. Create a workspace”Open Settings → Workspaces and click Add New Workspace, or choose Workspace from + New. Give it a name and a description.
→ More: Workspaces
4. Connect a source
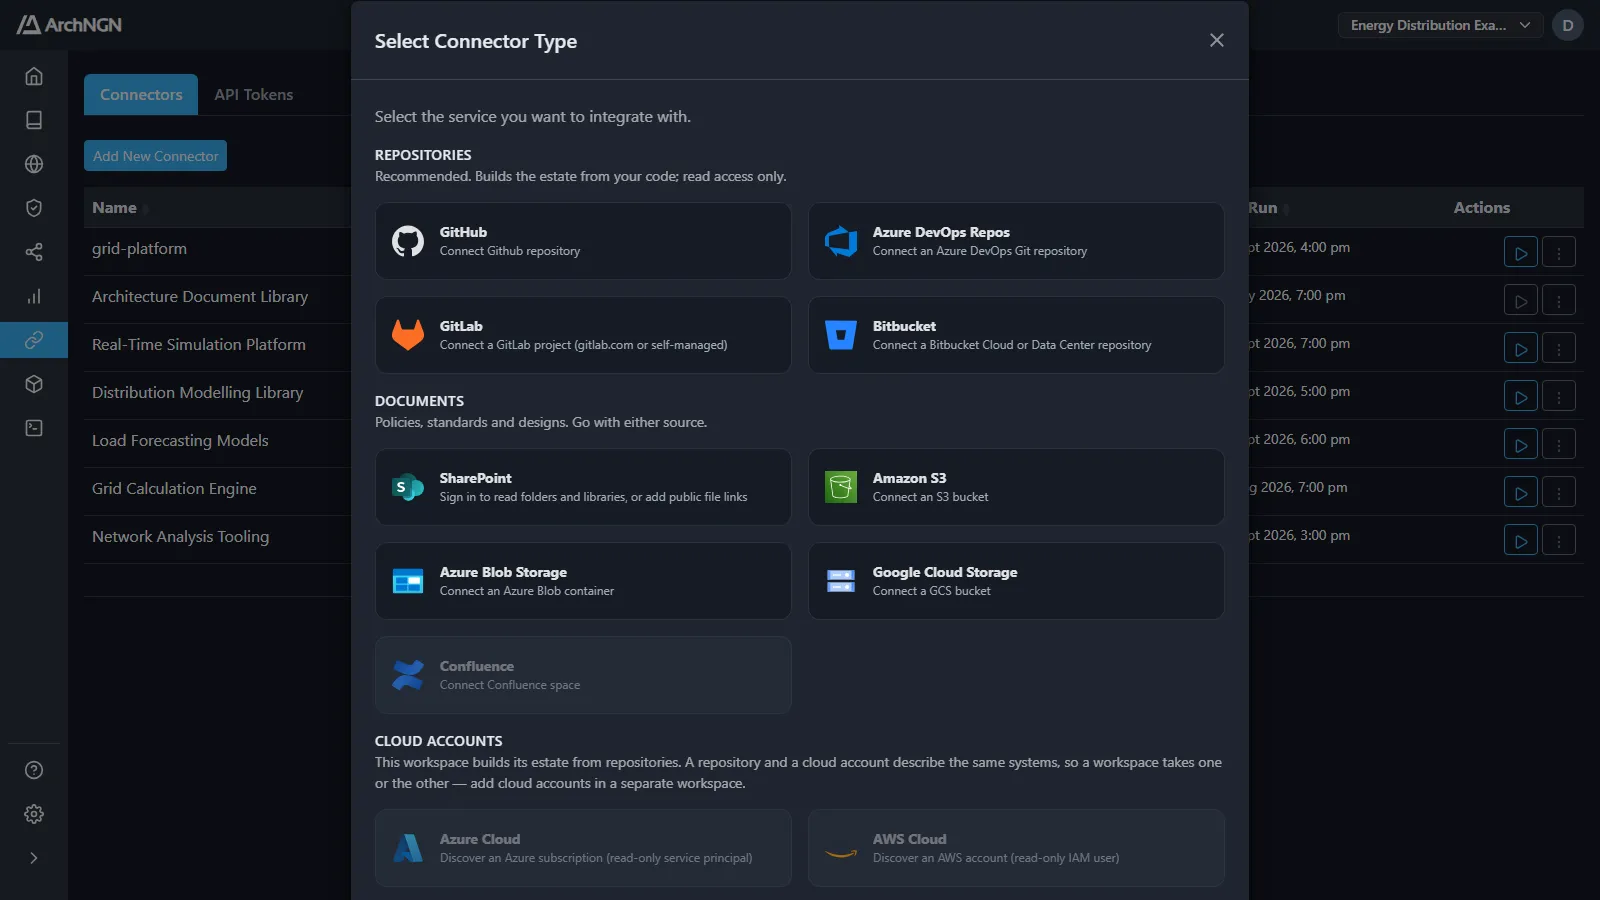
Section titled “4. Connect a source”Open Integrations → Connectors, click Add New Connector and choose a source. Repositories are recommended: they build the estate from your code, with read access only. A workspace takes its estate from repositories or from cloud accounts, not both. Document sources go with either.
Run the connector, and its objects and associations land in the active workspace.
→ More: Connectors
5. Check the model
Section titled “5. Check the model”Open the Repository to see what was mapped, and the Explorer to see how it connects. Add what no source can tell ArchNGN, such as owners, criticality and lifecycle, and confirm or reject the links the platform inferred.
→ More: Objects and associations and Explorer
6. Enable a policy pack
Section titled “6. Enable a policy pack”Open Settings → Policies. Every pack starts off. Click Enable on the frameworks your organisation answers to, or turn your own policy documents into a custom policy pack. An enabled pack reports at Advisory until you switch on Enforce.
→ More: Frameworks and Custom policies
7. Work through the findings
Section titled “7. Work through the findings”Open Governance → Findings. Each finding says what is wrong, which rule it breaks and what is missing. Fix it at the source, record the missing fact as a tag, or accept the risk with a reason and an expiry.
→ More: Findings and Exceptions
8. Gate a pipeline or connect an agent
Section titled “8. Gate a pipeline or connect an agent”Create a token under Integrations → API Tokens. Add the design check step to your CI pipeline, or add the MCP server to your coding agent. Every change it checks appears under Governance → Checks.
→ More: Design checks, REST API and tokens and MCP server
What next?
Section titled “What next?”- Generate or review a design with a workstream.
- Share the model with stakeholders through Reports.
- See who did what in the Audit log.